Friday, 14 February 2014

Fast Friday - Week 3

Happy Valentine's Day!

I have another project for you that you can make in under 10 minutes. The design for the card was inspired by one I saw on the blog Smitten with All Things Stamping via Pinterest (don't you just love Pinterest - although you can waste a AWFUL lot of time on there....)


To make this project you will need:

Cardstock/Paper: Basic Black, Pool Party, SAB Sweet Sorbet DSP, Silver Glimmer Paper ♦ Stamps: SAB See Ya Later ♦ Ink: Black Stazon ♦ Tools/Accessories: SAB Sweet Sorbet Accessory Pack, White Signo gel pen, Owl Builder punch (for the little hearts)


You can order from my online shop 24/7 or if you prefer contact me directly. Don't forget you can choose a free product from the Sale-a-Bration promotion for every £45 (before P&P) that you spend on catalogue items until 31 March 2014.


A la prochaine! Amitiés!

Nicole

Saturday, 8 February 2014

Pinkies Stampin' Up! Spring Summer 2014 Blog Hop

Thank you for joining us on another Pinkies Blog Hop! We're showcasing lots of gorgeous projects using products from the new Stampin' Up!® Spring/Summer Catalogue. Simply use the buttons at the end of each post to keep hopping!

Welcome to those who have joined me from Clare's blog - wasn't her sweetie cone gorgeous? I just love how she has used the gold vellum and the sequin trim!

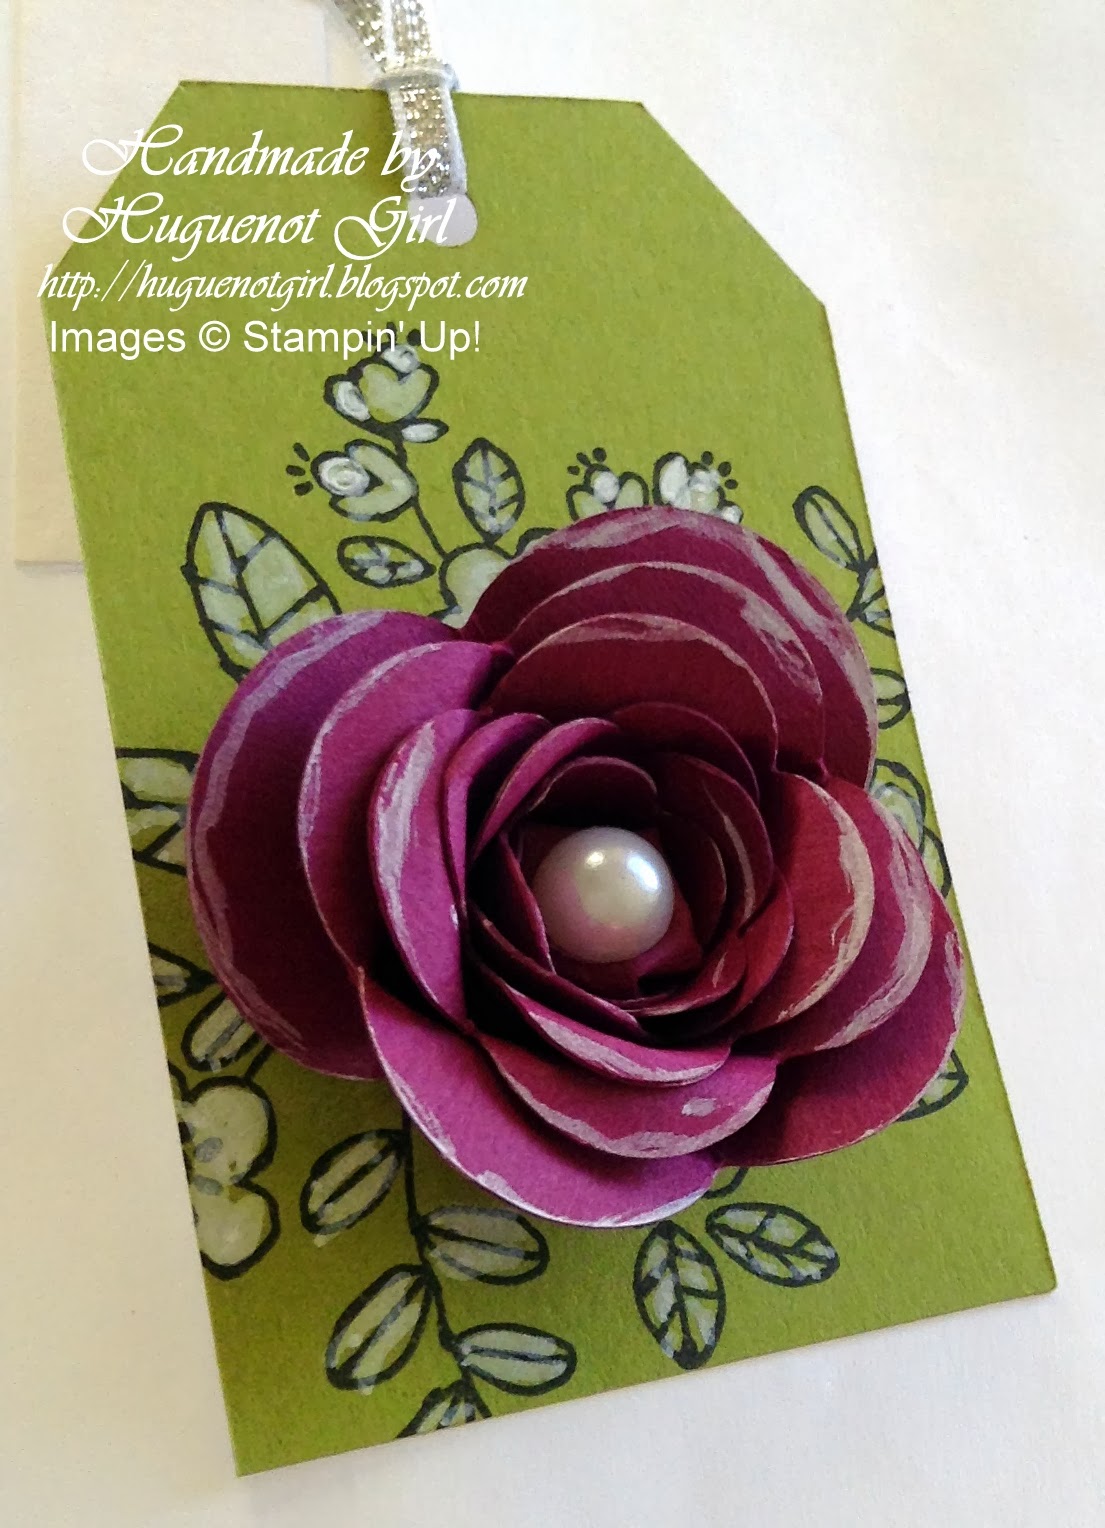
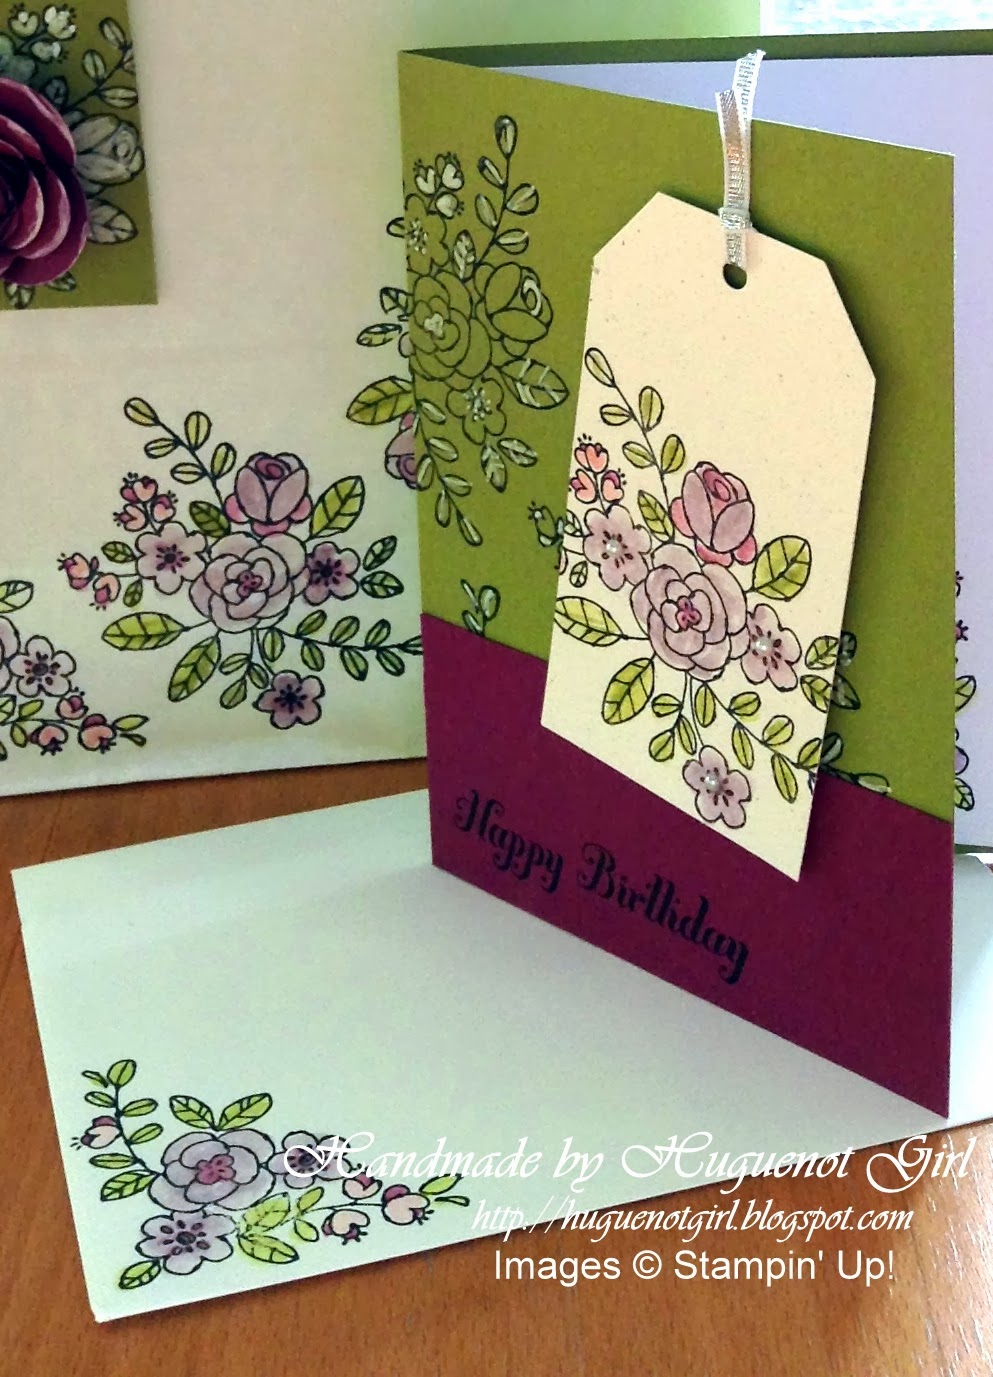
I have focused on two new products from the new seasonal catalogue – the So Very Grateful stamp set, and the Angled Tag Topper punch. I have used these to turn a plain white bag (see yesterday's post) into a (hopefully) pretty gift bag. I stamped the images from the new So Very Grateful stamp set in black stazon and then coloured in using a blender pen, which gives a more muted effect. The tag topper punch is fab – you can create a tag or topper any length you want and it even creates the hole for you!


I also used the new spiral flower die to quickly accent the tag with a stunning 3D flower (I used Crystal Effects to hold it all together).  

Of course you can’t give a present without a card, so I made a card (and envelope) to match and incorporated a tag (using the Angled Tag Topper punch once again)!


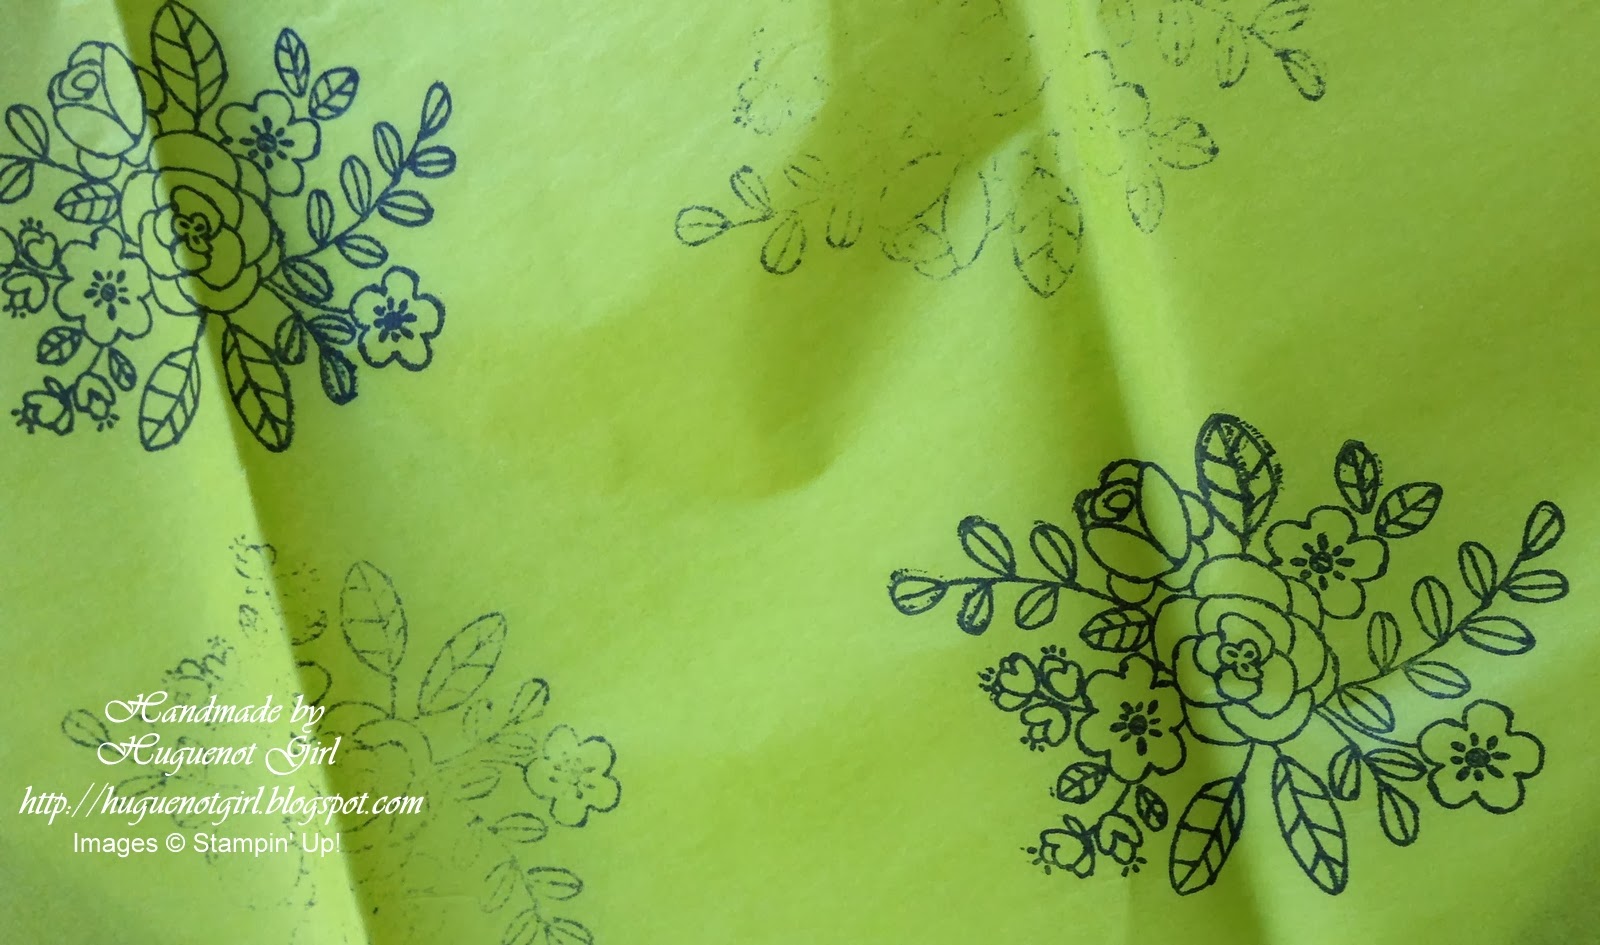
As you can probably tell I am very matchy, matchy – I even went so far as to wrap the present in the gift bag in co-ordinating tissue paper onto which I have stamped the flower images from the So Very Grateful set in black stazon. You might notice that it looks like I stamped the images a 2nd time to get a fainter image in the background. Actually no – this was not planned (the tissue paper was folded in half when I stamped the first half and because the paper is so thin the original image bled through – oops!). But as all good crafters know – there is no such thing as a mistake!


To make this project you will need:

Cardstock/Paper: Naturals White, Old Olive, Rich Razzleberry ♦ Stamps: So Very Grateful, Bring on the Cake (greeting), Tag It (for reverse of tag - not shown) ♦ Ink: Black Stazon, Old Olive, Pear Pizzazz, Rich Razzleberry, Perfect Plum, Pink Pirouette ♦ Tools/Accessories: Blender pen, Chevron embossing folder, basic pearls, Stampin' Dimensionals, White Stampin’ chalk marker, Angled Tag Topper punch, Spiral Flower Originals die, Silver ribbon, Crystal Effects, plain white paper gift bag, tissue paper


You can order from my online shop 24/7 or if you prefer contact me directly.  Don't forget you can choose a free product from the Sale-a-Bration promotion for every £45 (before P&P) that you spend on catalogue items until 31 March 2014.

Have a great weekend huddled up and make you sure you stop by Nina's blog as I know she has a fab project to share with you. Click on the next button below to take a look....


Have a fantastic weekend!  A la prochaine! Amitiés!

Nicole
Friday, 7 February 2014

Fast Friday - Week 2

Yay - I've kept it up (ok it's only week 2)! I'm returning once again with a project that you can make in under 10 minutes. The design for the card was inspired by one I saw on France Martin's blog.


To make this project you will need:

Cardstock/Paper: Basic Black, Pool Party, SAB Sweet Sorbet DSP ♦ Stamps: SAB See Ya Later, Memorable Moments ♦ Ink: Black Stazon ♦ Tools/Accessories: Basic pearls, Stampin' Dimensionals, Elegant Butterfly punch, Bitty Butterfly punch, 2½ Circle punch


You can order from my online shop 24/7 or if you prefer contact me directly. Don't forget you can choose a free product from the Sale-a-Bration promotion for every £45 (before P&P) that you spend on catalogue items until 31 March 2014.


Why not come back tomorrow to see how I have totally transformed this plain white bag into something special?

A la prochaine! Amitiés!

Nicole

Friday, 31 January 2014

Fast Friday - Week 1

Bonjour!

As one of my new year's resolutions I decided I should be posting more frequently on this blog and to incentivise me I decided I would come up with a regular feature!  (OK - I know it is the last day in January so I'm a bit late starting!)

So the theme (as you can hopefully tell from the post title) is "Fast Friday"!  This means you should be able to make the card/project in less than 10 minutes.  Admittedly this will not (always) include my design time.  I find that it is the design/coming up with the idea that takes me the longest!  Do you have that problem? Well if that is the case then I have done the hard work for you!


So let's get started with the first project.... This week I decided I would take the layout from the current Less is More challenge so this really helped in quickening up the design time.  The flowers have been created using the new Petite Petals stamp set and coordinating punch from the new Spring/Summer catalogue (there is a bundle available if you want both and like a bargain!).  Some of the flowers were created using the SAB Sweet Sorbet paper.

To make this project you will need:

Cardstock/Paper: Naturals White, Whisper White, Basic Black, Calypso Coral, SAB Sweet Sorbet DSP ♦ Stamps: Wetlands, Petite Petals ♦ Ink: Stazon, Silver Metallic Encore ♦ Tools/Accessories: Honeycomb embossing folder, basic pearls, Stampin' Dimensionals, Petite Petals punch


You can order from my online shop 24/7 or if you prefer contact me directly.  Don't forget you can choose a free product from the Sale-a-Bration promotion for every £45 (before P&P) that you spend on catalogue items until 31 March 2014.

Have a fantastic weekend!

A la prochaine! Amitiés!

Nicole

Saturday, 25 January 2014

Pinkies Stampin' Up! Sale-a-Bration Blog Hop


Thank you for joining us on another Pinkies Blog Hop! We're showcasing lots of gorgeous projects using new Stampin' Up!® products that you can earn free during Sale-a-Bration. Simply use the buttons at the end of each post to keep hopping!

Welcome to those who have joined me from Sarah's blog - wasn't her owl gift box cute? I just love how she has used the Sale-a-Bration (SAB) products.

My project focuses on 2 of the products from one of the best ever Sale-a-Bration promotions in the UK – the Sweet Sorbet Designer Series Paper (DSP) and the banner punch.


You will see I have created a simple card using the paper and punch as well as using the pool party twine from the SAB Sweet Sorbet accessory kit (there are also 2 other spools of twine as well as cork embellishments which are not shown here). By the way do you know what is even better about the banner punch?? Well it will be one of 2 SAB items that will be transferring to the new annual 2014-15 catalogue that will launch in July (the other item is an embossing folder).


I have also got another quick project to share with you – a gift wrapped mini chocolate bar. Once again I have used the SAB Sweet Sorbet DSP, the pool party twine as well as the banner punch. Actually quick to do, but really jazzes up a mundane bar of chocolate into something special!


Recipe
Cardstock/Paper: Pool Party, Island Indigo, Basic Black, SAB Sweet Sorbet DSP
Stamps: Teeny Tiny Sentiments
Ink: Island Indigo, Whisper White
Tools/Accessories: SAB Banner Punch, SAB Sweet Sorbet Accessory Kit, Stampin’ Dimensionals, glue dots, rhinestones, white gel pen, Stamp-a-ma-jig

So how can you get the Sale-a-Bration products? Well the promotion lasts from Tuesday 28 January until 31 March 2014 and there are 13 free products up for grabs.  Basically, you can choose a free product from the Sale-a-Bration leaflet for every £45 (before P&P) that you spend on catalogue products. Why not visit my current promotions page for more details?

Have a great weekend huddled up and keeping dry from the UK’s showery weather and make sure you stop by Krista's blog as I know she has some fab gift envelopes to share with you. Click on the next button below to take a look....


A la prochaine! Amitiés!

Nicole

Saturday, 14 September 2013

Pinkies Stampin' Up! Autumn/Winter Seasonal Catalogue Blog Hop


Thank you for joining us on another Pinkies Blog Hop! We're showcasing lots of gorgeous projects using products from the new Stampin' Up!® Autumn/Winter Seasonal Catalogue. Simply use the buttons at the end of each post to keep hopping!

Welcome to those of you who have joined me from Tracy's blog - wasn't her project gorgeous?

My project is focusing on two stamp sets from the seasonal catalogue – Wishing You and Very Merry Tags.

You will see I have created a Christmas card in non-traditional colours and I have gone for a narrow card (which will still fit into a C6 envelope) using Pool Party as my cardstock base. Pool Party was one of the former in-colours that is now one of the Subtles following the colour refresh earlier in the year. So glad it came back as it is one of my favourite colours!


Recipe
Cardstock/Paper: Pool Party, Whisper White
Stamps: Wishing You, Meadow (hostess), Very Merry Tags
Ink: Island Indigo, Wisteria Wonder, Elegant Eggplant, Bermuda Bay
Tools/Accessories: Mosaic Punch, Pearls, Island Indigo Baker’s Twine, Stampin’ Dimensionals, Reindeer (not included!)

The Very Merry Tags stamp set coordinates with 7 of Stampin’ Up’s fabulous punches – but I have obviously only shown one stamp image from the set here - the remaining stamps coordinate with different punches.  Although you get the best finish (plus it’s quicker!) if you have the punches, it’s not essential as long as you are prepared to cut by hand!


This card would be good to make in bulk, so if you would like to get started early on your Christmas cards why not contact me to book a party and I will show you how easy it is to make this simple but stunning card! Or why not click on my "shop now" button at the top of my blog to order your supplies straight away?

Have a great weekend huddled up and keeping warm now that the UK’s summery weather appears to be over.  So why not make sure you stop by Michelle Last's blog as I know she has a fab project to share with you. Click on the next button below to take a look....


A la prochaine! Amitiés!

Nicole

Thursday, 12 September 2013

Washi Tape Christmas Card

As many of you will know one of the latest trends in paper crafting is washi tape. Stampin' Up! first introduced washi tape in their Annual Catalogue that came out in July, but have brought out more in their latest catalogue - the Autumn/Winter seasonal.

I have cased a card that I have seen in various places over the internet, but which I primarily saw on Chic' n Scratch - Angie Kennedy Juda's blog. I have done my own version turning it into a Christmas card


Recipe
Cardstock/Paper: Whisper White, Cherry Cobbler textured 12x12 cardstock
Stamps: Very Merry Tags
Ink: Old Olive, Cherry Cobbler
Tools/Accessories: Season of Style Washi Tape, Artisan Label Punch, Big Shot, Modern Mosaic Embossing Folder, Cherry Cobbler Baker’s Twine, Stampin’ Dimensionals

I have used one of the images from the versatile Very Merry Tags stamp set which comes from the new Autumn/Winter Seasonal Catalogue.  The image I have used coordinates with the Artisan Label punch, but there are also a further 6 (yes 6!) images that coordinate with other lovely Stampin' Up! punches.

After I had stuck the washi tape to the Whisper White mat (and before I matted it onto the textured Cherry Cobbler cardstock - another new product from the seasonal), I embossed it with the Modern Mosaic embossing folder.  To get a neat effect with the stamped image I used my marker pens to colour the words on the stamp in different colours.


What do you think? If you would like to see another project using one of the stamps from Very Merry Tags please come back on Saturday when you will see something completely different!

A la prochaine! Amitiés!

Nicole

LinkWithin

Related Posts with Thumbnails