Showing posts with label Gift Bag. Show all posts

Wednesday, 24 December 2014

Last Minute Gift Wrapping

Sorry for not posting for a while, but unfortunately life has thrown a curve ball. The quote by John Lennon springs to mind "Life is what happens while you are busy making other plans" - too true!

So because of December's curve ball I have not done much crafting. However this was rectified yesterday as I need to wrap some presents for friends. Time was short so I decorated a couple of bags - I am well known by friends and family for my gift bags! Admittedly this one is quite basic, but I am really pleased with how it has turned out and I am a great believer that less is more.


If you love the stamped image featured on the bag you will need to hurry as the Autumn/Winter catalogue that this stamp is featured in will finish on 5 January 2015. It might be too late for you to use this stamp set for Christmas this year, but you could get it ready for next! The note tag punch though is carrying over into the Spring/Summer Catalogue that comes out on 6 January 2015.

To make this project you will need:

Stamps: Cheerful Christmas  Ink: Cherry Cobbler  Tools/Accessories: Kraft Paper Bag (from craft stash), Cherry Cobbler Seam Binding Ribbon, Note Tag Punch, Cherry Cobbler Baker's Twine


You can order from my online shop 24/7 or if you prefer contact me directly.

I hope my gift bag has inspired you for some quick last minute gift wrapping.

I would like to wish all my readers a lovely Christmas. A la prochaine! Amitiés!

Nicole

Sunday, 20 April 2014

Easter Bunnies Everywhere!

Happy Easter! We are having a big family get together and will be exchanging gifts later today. Do you want to see what I have made? Firstly, I have decorated the plain brown lunch bags with gifts for my Mum and my aunt.


And using some scallop circle punches and some dimensionals I put a little "fluffy" tail on to the back of the bag.


The rest of the family had some bunny ear bags that were a combination of two different projects by some fellow demonstrators (the bunny ear bags by Vicky and the Easter bunny box by Michelle).

And look how quickly they multiplied - LOL!


To make these projects you will need:

Cardstock/Paper: Crumb Cake, Whisper White, Blushing Bride, Basic Black, Basic Grey  Ink: Craft Whisper White, Basic Black marker  Stamps: Positively Chevron, Polka dot (stamp set from stash - non-SU)  Tools/Accessories: Plain brown lunch bag (from local discount store), Tag a Bag Gift Bag, Owl builder punch, Scallop Circle ⅞” punch, Scallop Circle 1¼” punch, Scallop Tag Topper punch, Small Heart punch, Large Oval punch, Extra Large Oval Punch, Linen thread, Blushing Bride Chevron Ribbon, Stampin' Dimensionals


You can order from my online shop 24/7 or if you prefer contact me directly.

Hope you have a lovely Easter!

A la prochaine! Amitiés!

Nicole

Sunday, 6 April 2014

Chevron Cards & Matching Gift Bag

On Friday I promised you I would show today the whole project that Fast Friday 10's card came from... Well firstly I didn't just make one card ... I made three!


And there's more ... they all fit inside a co-ordinating gift bag (yes I know I am very matchy, matchy!):


This project makes a great present for friends and/or family – I did something similar as stocking fillers at Christmas and they went down a storm. I did them in different colourways/combinations than the one here - and tried to choose (what I knew/thought) were the favourite colours of the recipient!

Top tip - to make sure you get an even and full impression when using a large background stamp, make sure you use a wood mounted version of the stamp and take the ink pad to the stamp and then place your folded card base on top of the stamp. Place a piece of scrap paper over the top and then using the brayer roll over the entire stamp - works every time!

In fact I have just returned from an A-MAZ-ING crafting weekend in Birmingham with some fellow demonstrators and I designed this version of the project for one of the Make & Take sessions. The whole weekend we crafted, we shared and we cared! And now we are ... exhausted!

If you like this project and place an order for £30 or more during April, I will give you a free copy of the tutorial with all the instructions you need.

To make this project you will need:

Cardstock/Paper: Crumb Cake, Real Red, Coastal Cabana, Whisper White, Fresh Prints DSP stack  Stamps: Positively Chevron, Too Kind, Teeny Tiny Sentiments  Ink: Real Red, Cherry Cobbler, Coastal Cabana, Bermuda Bay, Crumb Cake, Early Espresso, Craft White  Tools/Accessories: Tag a Bag Gift Bag, Scallop 2⅜" Circle punch, Circle 1¾” punch, brayer, glue dot/tombow


You can order from my online shop 24/7 or if you prefer contact me directly. Make sure you check back on Wednesday 9 April as Stampin' Up! will be releasing weekly deals throughout April and I have no idea what they will be - so I am just as excited as you!

A la prochaine! Amitiés!

Nicole

Saturday, 8 February 2014

Pinkies Stampin' Up! Spring Summer 2014 Blog Hop

Thank you for joining us on another Pinkies Blog Hop! We're showcasing lots of gorgeous projects using products from the new Stampin' Up!® Spring/Summer Catalogue. Simply use the buttons at the end of each post to keep hopping!

Welcome to those who have joined me from Clare's blog - wasn't her sweetie cone gorgeous? I just love how she has used the gold vellum and the sequin trim!

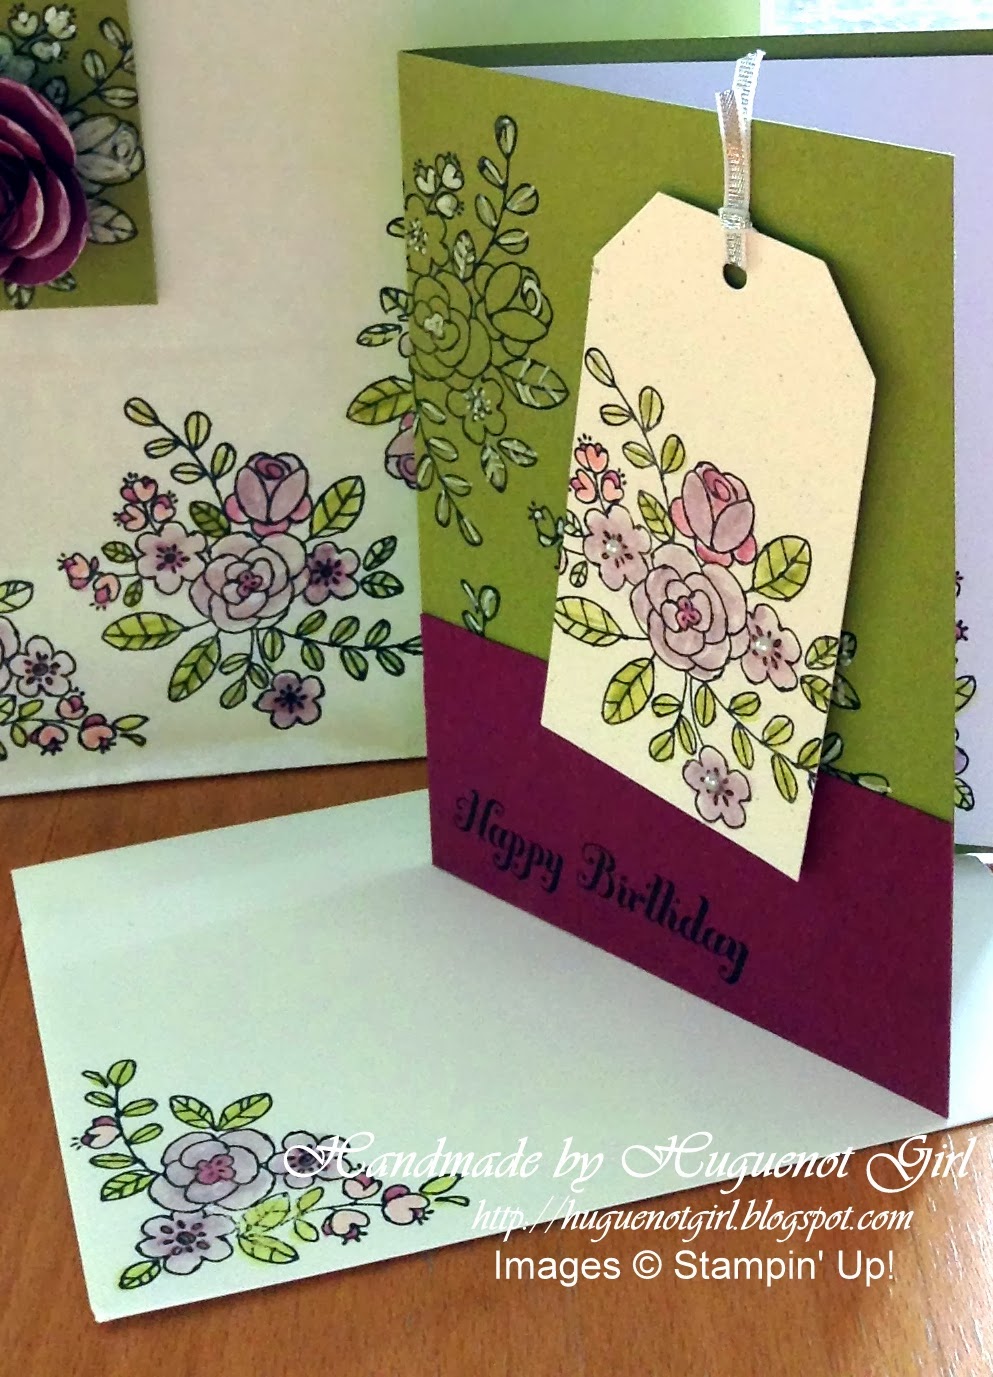
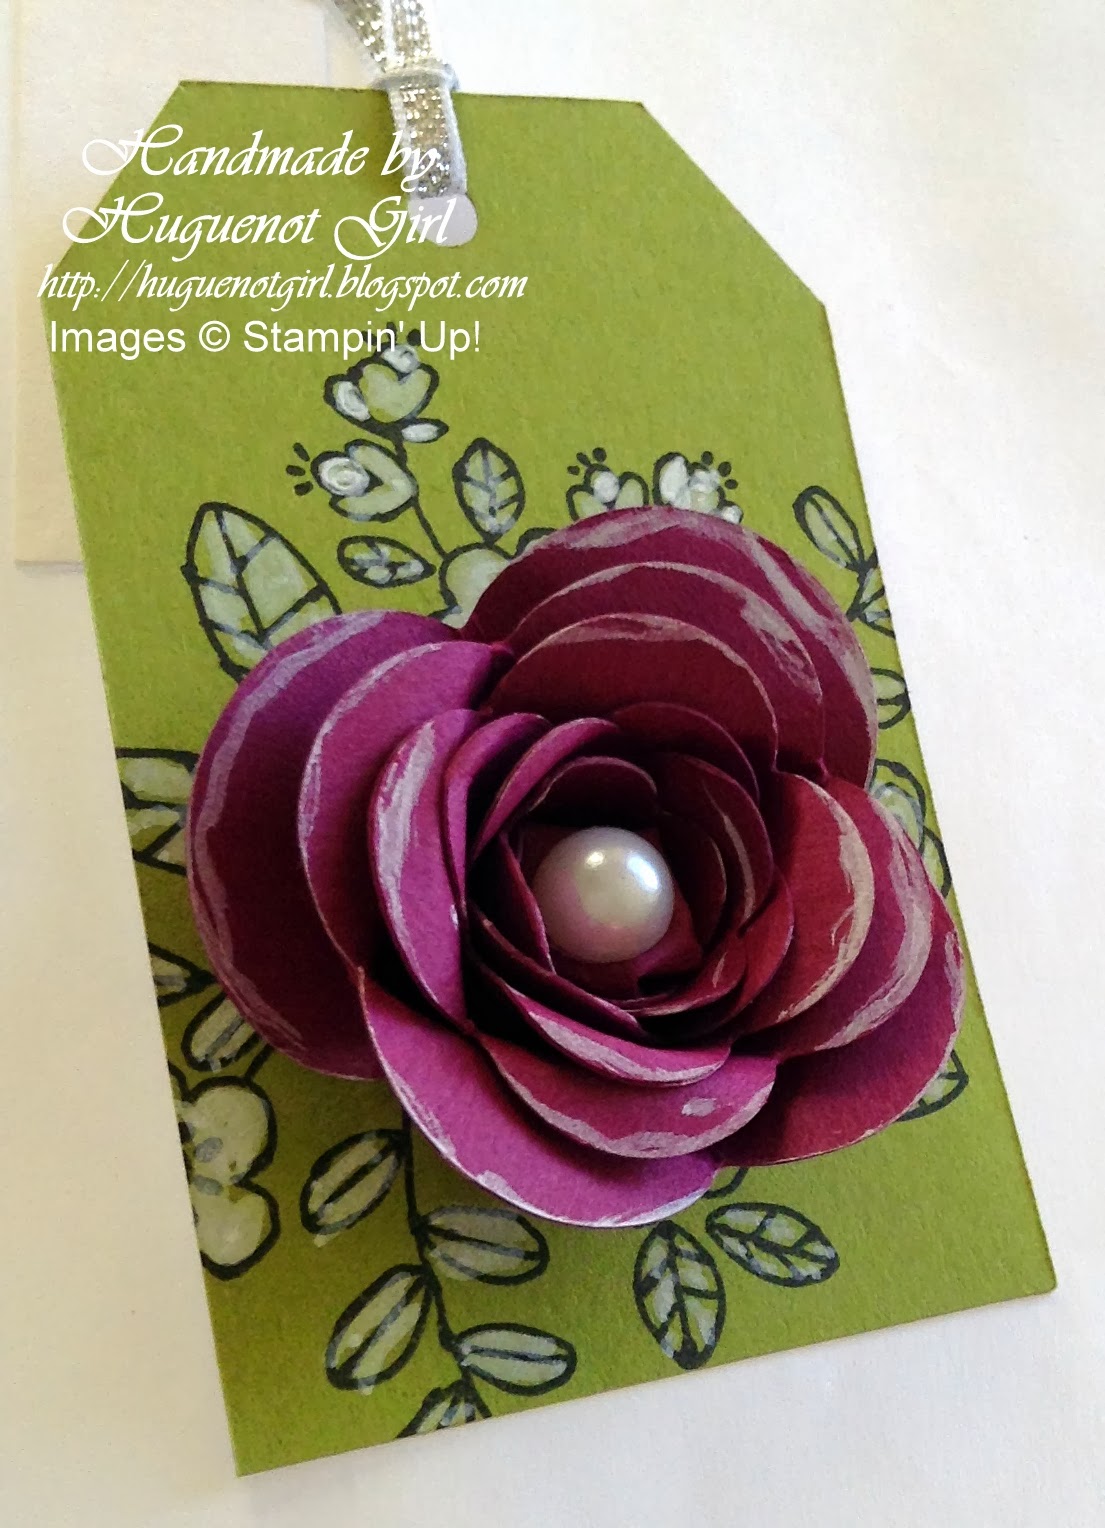
I have focused on two new products from the new seasonal catalogue – the So Very Grateful stamp set, and the Angled Tag Topper punch. I have used these to turn a plain white bag (see yesterday's post) into a (hopefully) pretty gift bag. I stamped the images from the new So Very Grateful stamp set in black stazon and then coloured in using a blender pen, which gives a more muted effect. The tag topper punch is fab – you can create a tag or topper any length you want and it even creates the hole for you!


I also used the new spiral flower die to quickly accent the tag with a stunning 3D flower (I used Crystal Effects to hold it all together).  

Of course you can’t give a present without a card, so I made a card (and envelope) to match and incorporated a tag (using the Angled Tag Topper punch once again)!


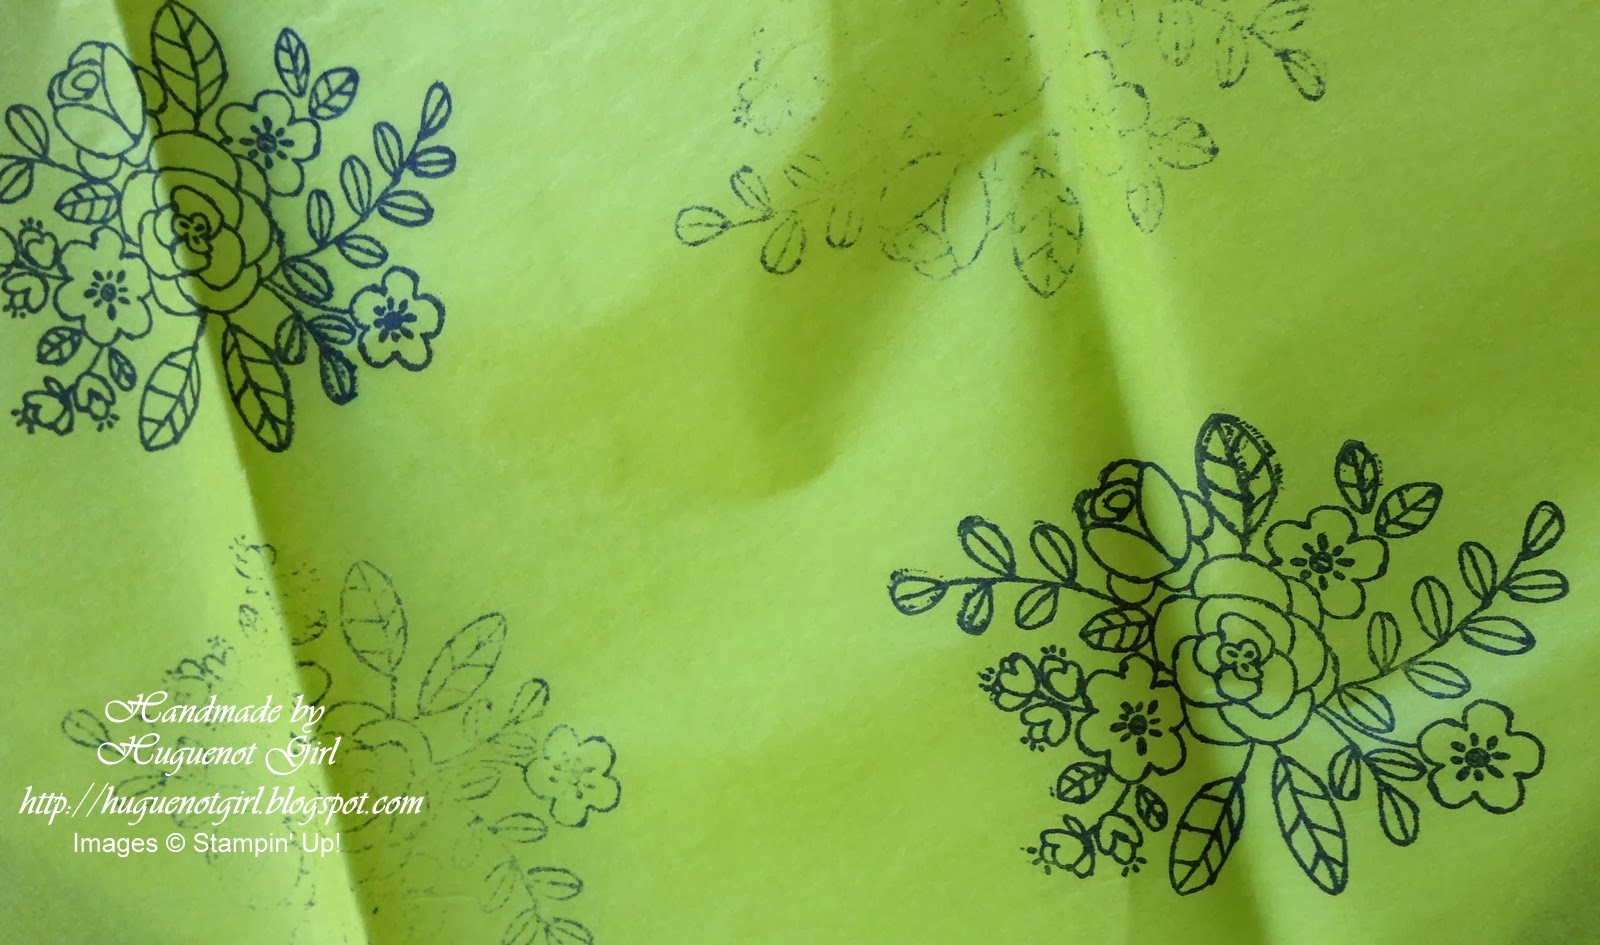
As you can probably tell I am very matchy, matchy – I even went so far as to wrap the present in the gift bag in co-ordinating tissue paper onto which I have stamped the flower images from the So Very Grateful set in black stazon. You might notice that it looks like I stamped the images a 2nd time to get a fainter image in the background. Actually no – this was not planned (the tissue paper was folded in half when I stamped the first half and because the paper is so thin the original image bled through – oops!). But as all good crafters know – there is no such thing as a mistake!


To make this project you will need:

Cardstock/Paper: Naturals White, Old Olive, Rich Razzleberry  Stamps: So Very Grateful, Bring on the Cake (greeting), Tag It (for reverse of tag - not shown)  Ink: Black Stazon, Old Olive, Pear Pizzazz, Rich Razzleberry, Perfect Plum, Pink Pirouette  Tools/Accessories: Blender pen, Chevron embossing folder, basic pearls, Stampin' Dimensionals, White Stampin’ chalk marker, Angled Tag Topper punch, Spiral Flower Originals die, Silver ribbon, Crystal Effects, plain white paper gift bag, tissue paper


You can order from my online shop 24/7 or if you prefer contact me directly.  Don't forget you can choose a free product from the Sale-a-Bration promotion for every £45 (before P&P) that you spend on catalogue items until 31 March 2014.

Have a great weekend huddled up and make you sure you stop by Nina's blog as I know she has a fab project to share with you. Click on the next button below to take a look....


Have a fantastic weekend!  A la prochaine! Amitiés!

Nicole
Sunday, 13 February 2011

Birthday Flowers

Just showcasing a recent card and matching gift bag that I made for a friend at work (she has received these so I know it is safe to share them here as she does read my blog).

This is a close up of the card - I used a masking technique with a post-it note for the background flower image.  I have used SU Crumb Cake ink on SU Crumb Cake Cardstock for a tone on tone effect.  I got the idea for the flower from Debbie Olson's blog - she used the die with felt to make a poinsettia brooch (I did try this but my version was a bit naff so went with a paper version and used it as an embellishment)


I made a co-ordinated  mini gift bag as well for the necklace I bought her.  This time I used SU's Old Olive ink for the background flower image as I wanted it to stand out more as I only stamped the image once (which I accented with Stickles Patina - I LOVE STICKLES and own nearly all of the colours).


Recipe
Cardstock/Paper: SU Crumb Cake, SU Very Vanilla, PTI 2009 Bitty Dot Basics Patterned Paper,
Stamps: PTI Text Style II, PTI Backgound Basics: Botanicals, WMS Frame It
Ink: SU Crumb Cake, SU Old Olive, Momento Tuxedo Black
Tools & Accessories: PTI Signature Series Flower Die, PTI Favour It #3 Die, PTI Simply Chartreuse Swiss Dot Satin Ribbon, PTI Vintage Button Ripe Avocado, The Ribbon Girl Button Twine Jute Natural, Stickles Patina, SU Stampin Dimensionals

That's it - a quick post for me (makes a change!)

A la prochaine! Amitiés

Nicole

Friday, 6 August 2010

Tote-ally Cute?!

EDITED TO ADD - MY FAVOURITE PTI CARD FROM 2010

I got the idea for this card layout and design from a card designed by the lovely Dawn McVey and put my own spin on it.  I really loved the colour combo in Kristina Werner's Readers' Choice Colour Inspiration No 3 (which I used in a previous post, although I must admit that this time I haven't used one of the colours - celery) - so combined both to come up with the card below.  I have given this card to my colleague for her birthday tomorrow - hopefully she won't read this post before hand.


A few days after I finished the card I was feeling particularly creative and decided to make a coordinating tote bag for the gift I have given her.


I just LOVE the results and think it is tote-ally cute (LOL!).  When I gave it to Sue yesterday (as she is now on leave) she thought the gift bag was a present in itself!  What do you think?

Recipe
Stamps: Hero Arts Dots & Flowers, PTI Anniversary Set Round & Round, PTI All Booked Up, PTI 2009 Holiday Tags Collection (for "To & From" stamp on reverse of tote gift bag label - which you can't see!) 
Cardstock/Paper: SU Very Vanilla, SU Elegant Eggplant
Ink: Encore Purple, PTI Ripe Avocado, Brilliance Pearlescent Chocolate, Versamark
Tools/Accessories: Lauren Meader's Timeless Template Around Town Tote for PTI, PTI Matt Stack 3 Die, We R Memory Keepers Corner Chomper, We R Memory Keepers Crop-a-Dile, SU circle & scallop punches, SU oval punch, SU Old Olive satin ribbon, SU Stampin Dimensionals, Lilac self-adhesive gems from stash, Lilac Stickles

A la prochaine! Amitiés.

Nicole

LinkWithin

Related Posts with Thumbnails